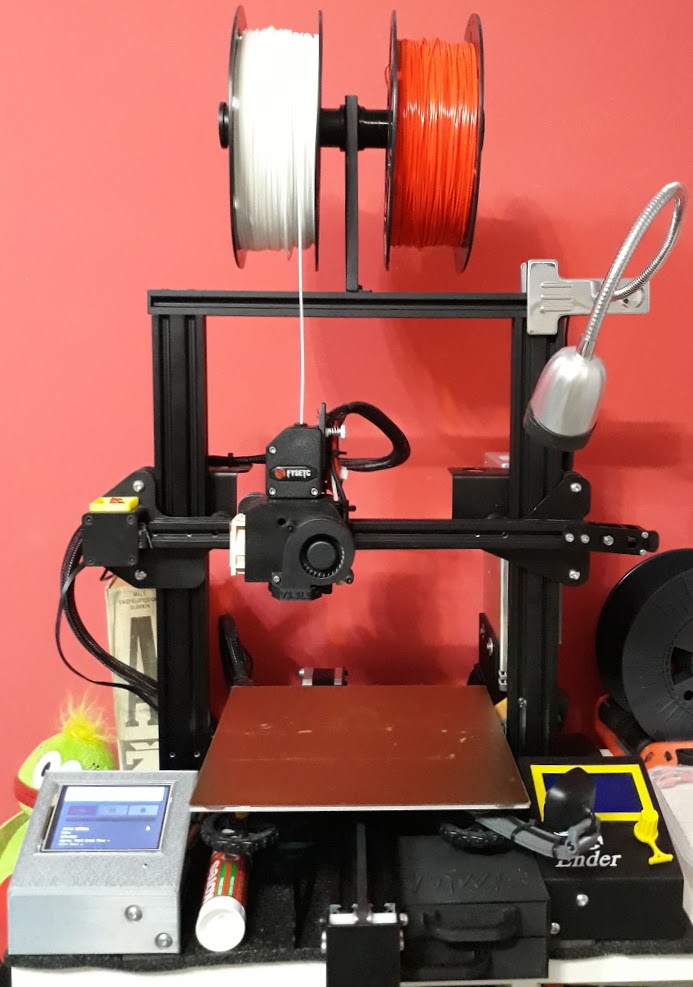
OctoEnder alias super-silent printer
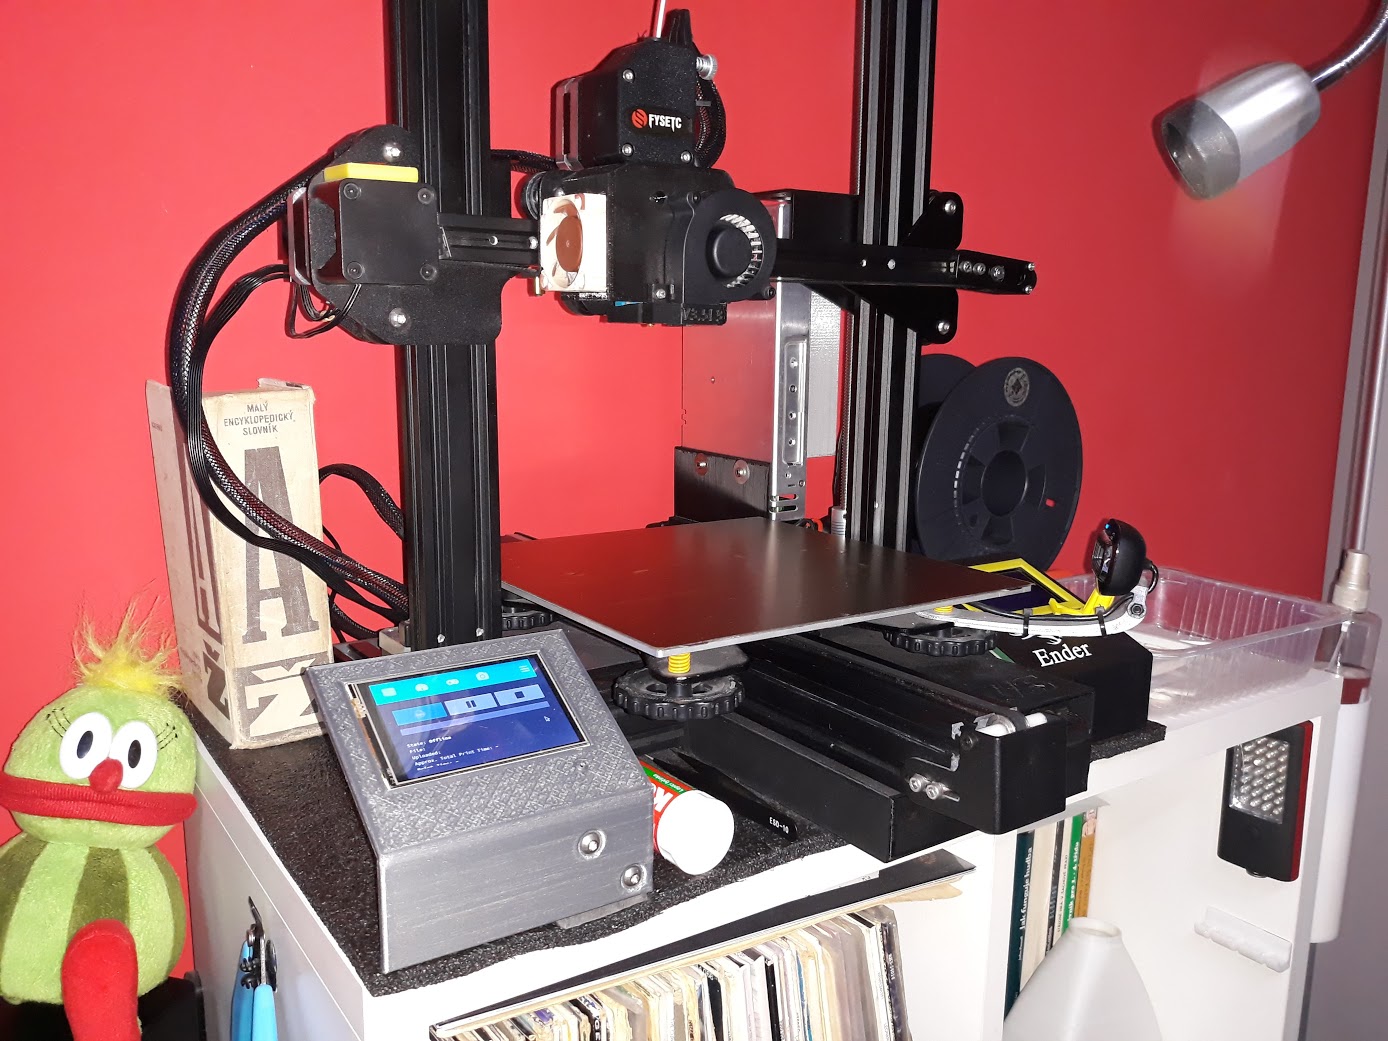
When I first saw the Prusa MK3s, I realized how quiet the printer could be. Really quiet, almost inaudible. So I try my best for the same results. With Ender 3 Pro :)
1. Springs
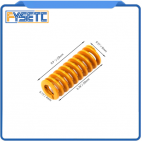 |
At first it was necessary to stabilize the bed, because otherwise one would leveling it until his death. It is a trivial exchange of original Creality springs for some stronger. There is no need to tune the first layer as often as the and setup remains essentially unchanged and the bed retains its position. Click on the picture to open the links directly for the one I purchased. |
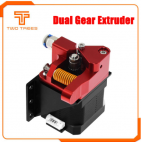
2. The Extruder
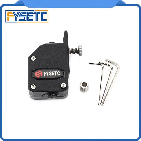 |
After trying almost all possibilities, the BMG Extruder clone won. I recommend to skip all evolutionary steps and buy this dual drive and geared extruder straight. You'll save a lot of money and nerves. You'll end up with him anyway, at least if you want a direct drive. Its charm is that you can use a much lighter motor with this extruder with 3:1 gears. |
3. Coolers
After setting up a printer like Ender 3, after the initial euphory that something is coming out, you will be confronted with two facts:
1. The printer is making a lot of noise
2. The printer is making a lot of noise even when it is not printing!
Both these properties have different causes and are solvable. With both of them I decided to turn in complete elimination.
 |
First came the fan inside the power supply. The small and roaring Chinese from the rice paper factory has been replaced by an 80mm cooler of more familiar brand. After examining the temperature requirements for cooling, I connected it to the speed controller, which is given on the fans inside PC computers. I pulled the revs to minumum, so I don't know about this at all. Even at low speeds, 80 mm will do more work than the miniature one before. If you do not want to spend on a speed controller, you can buy the cooler for 24V and operate it at half the power. The fan in the power supply is for 12V (at least for MeanWELL for Ender 3 Pro). |
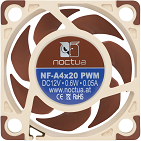 |
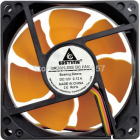
The second and third largest drones are the hetbreak cooling fan and exactly the same for the control unit cooling. I went to the most silence thing on the market right away. Notuca 40x40x20mm. It is a fan with lower flow, but its 10mm version also use Prusa. It is necessary to say it is necessary to use a hotend from E3D, namely V6 model (see below), or its clone. Of course, the biggest noise is the airflow itself, so any SUNON would probably do the same work as well. |
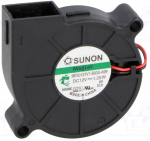 |
The fourth and last is the print cooling fan. Here, probably the quietest, but with sufficient performance, is the classic SUNON Maglev series. It is a so-called blower with a magnetic bearing. After experience with various cheap Chinese coolers for one dollar, which leave as often as the Ministers of Czech Government, it holds great. Now available for 24V input. Buy the green one - it allows PWM control. |
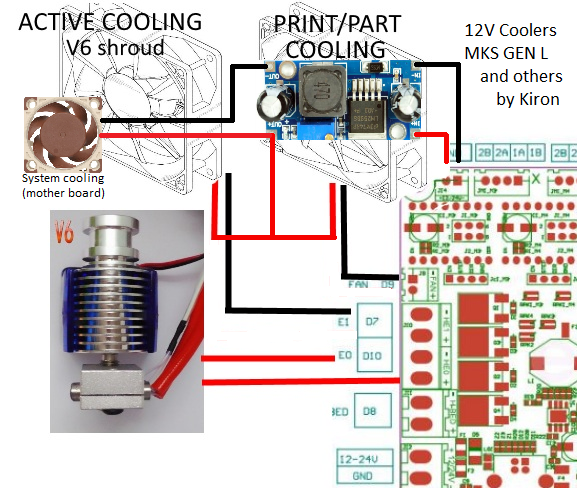
4. Wiring of 12V fans in 24V 3d printer.
|
|
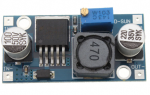
I deliberately chose 12V fans, because at that time most of the quality and quiet in 24V was not produced (SUNON is now available). To do this, I used a step-down converter to create a 12V power line in the printer, then connected it to the positive pole of all fans. |
|
|
RepRap-based printers (or all MKS, SKR .. boards) switch the ground against the positive pole with the mosfet, so you can also work with PWM using ONE step-down converter for the entire printer (see picture). |
5. The Mother board
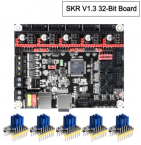 |
After the initial purchase of MKS GEN L, I ended up at Bigtreetech SKR 1.3. It is a 32bit board with five drivers. It has enough I/O connectors, so it"s enough for normal printer. You can add various sensors, switching lights, etc. to the printer. If you buy a board with five drivers, you have either one in stock, or you can use it on Dual Z or Dual Extruders. |
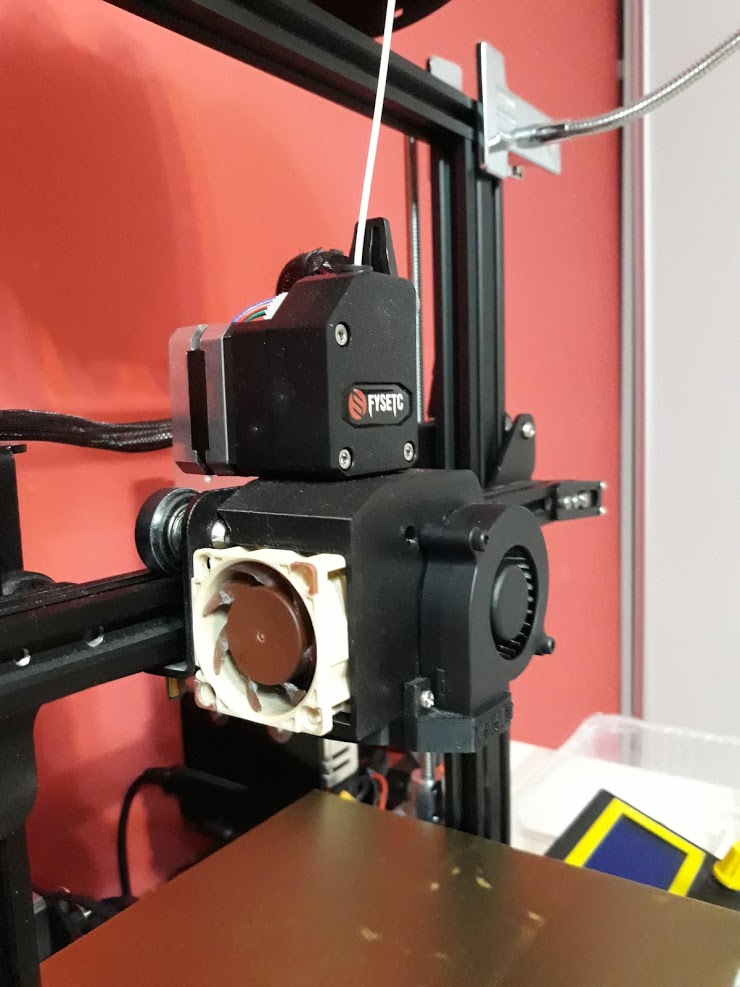
6. The Hot end
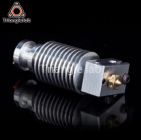 |
To use the Noctua silent fan, the hotend needs to be replaced. Probably the most widespread is the hotend V6 clone from Trianglelab. In my opinion, it is a very successful clone, which holds all the dimensions of the original manufacturer E3D. Cooling is very easy, the nozzles are available all over the Internet and on Thingiverse you can find dozens of fangs and attachments for this type. If you replace it once, you may not need to give another one. And yes, Prusa has this one too :) |
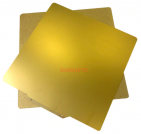
7. Print surface
Most people in our FB group print on a mirror. It is an inexpensive solution that will even level your bed. But is it not so much confortable.
 |
I bought this sheet with PEI foil. And that's another level. After cooling, the PLA practically detaches itself or you can help it by bending the sheet. However, when printing ABS or PETG, glue stick or another separate layer cannot be avoided - it holds like a Jewish feith and there is a danger that the PEI film will be destroyed.. The surface is smooth, but not as unnatural as when you print on a mirror. !!! Replacing PEI foils is possible, but beware of false foils on Aliexpress store, when instead of PEI you get ordinary plastic. !!! |
 |
The last one I just received is double-side from Energetic. On the one side classic PEI foil, on the other powder coated PEI. And as the manufacturer boasts, it is probably the only real PEI powder coated in China (statement from 2019). The structure is really transparent, as it should be with PEI and PLA holds it as nailed. For me probably the best choice, one side you get a smooth surface, the other is textured. |
For more information see my article How to choose flexible steel printing sheet with smooth and powder coated PEI.
8. Automatic bed leveling
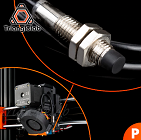 |
When using a magnetic pad, you automatically get the option of using an induction sensor for automatic calibration. I managed to get an orginal Prusa P.I.N.D.A. v2, but Trianglelab also clones this. I have no experience with the accuracy of these clones, so I give the link without guarantee. The probe also has a temperature sensor for more accurate measurements, for which even support is being prepared in Marlin. Mine is still unused, but honestly, when I saw the deviations, I don't intend to implement it yet. |
9. Octoprint
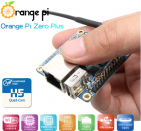 |
Running with a SD card, especially if your computer is away from the printer, will start to get on your nerves very quickly. For example, the Octoprint system can be used to control the printer remotely. Typically installed on Raspberry Pi, but I went the Orange Pi Zero Plus, which has the same performance (but half RAM 512MB), and is more than half cheaper. Honestly, if you're not getting enough of Linux, buy original Raspberry Pi. The basic installation of Octoprint is still relatively easy on Orange Pi, however putting various peripherals into operation is a way to modify scripts, libraries and even the source code. |
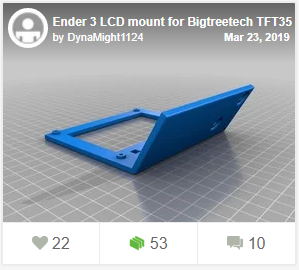
10. LCD for Octoprint
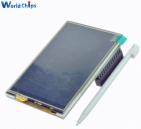 |
If you have a printer away from your computer, you have solved the file transfer with Octoprint, but you only have a control of the print proces on your PC. Although you are not running with an SD card, but run in the opposite direction, even more often :) The solution is a mobile phone or an additional touch LCD display. This will launch the Touch UI, which is the Octoprint web interface pre-designed for small and touch displays. It was with this LCD that I enjoyed most of the Orange Pi Zero "fun". |
11. Software light control
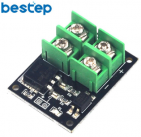 |
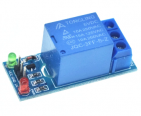
The MOSFET module is best suited for controlling external devices, such as time-lapse video lighting. Do not buy any modules with the IRF520 mosfet. These are sold as modules for Arduino, but 5V really do not switch it, and off courcse, 3.3V from modern boards too. This module is versatile and handy, when the transistor is opened directly by a switched voltage (eg 12V or 24V, so it is always fully open after switching) and the input is controlled by an optocoupler, which responds to both 3.3V and 5V on input. As a bonus you have protected the input of the board that switches it. |
12. Power suply control
 |
It is also very useful to have the printer power control from the above mentioned Octoprint. Due to its consumption, Octoprint can run continuously, powered eg. by a phone charger. Switching the printer was solved by bridging the power switch by this relay. This solution has the advantage that the printer can still be turned on manually. It remains functionally independent of Octoprint. Thanks to plugins, the printer itself shuts down when is idle, waiting for the hotend to cool below 50 ° C etc., before turning it off. |
13. Direct drive
When you enter a bowden vs direct drive into Google, you will usually get two basic characteristics of these solutions that will make your choice easier.
Direct drive - possibility to print flexi materials, Bowden - speed. Honestly, don't believe in it :)
Although bowden has a lower printhead weight and can achieve theoretically higher speeds when moving, but longer retraction (typically 4-6mm) and filament springing at a distance of at least 30, often 70cm will do not its best. Direct drive with light engine, so called pan-cake, it does not add much to the weight and you know the benefits immediately.
a) Retraction - reduction of retraction to typically 1.5 - 2mm at 120mm/s (as opposed to 25mm/s for bowden soulitons) will increase print speed noticeably.
b) Flexibility of filament - thanks to shorter filament, which shrinks along the way and lengthens the results, judging considerably subjectively, are better.
The above applies purely to my printer configuration; if you have any other findings, I do not argue.
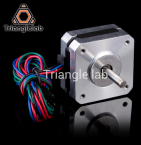 |
I used a pan-cake engine from Trianglelab. The engine has some 135g and with the TMC2208 driver and geared BMG extruder runs beautifully, quietly and with sufficient power. On Ali it is possible to find engines for about $3, but for that I did not have the courage :) After all, the drive of the extruder is quite essential. |
|
Currently, probably the best extruder and reasonable price is a BMG extruder clone. I bought from FYSETC. It works very well. However, I cannot compare it with other manufacturers. The extruder is geared 1:3 so it can extrudes anything even with a weaker motor. At normal print speeds, the motor and extruder are quiet. |
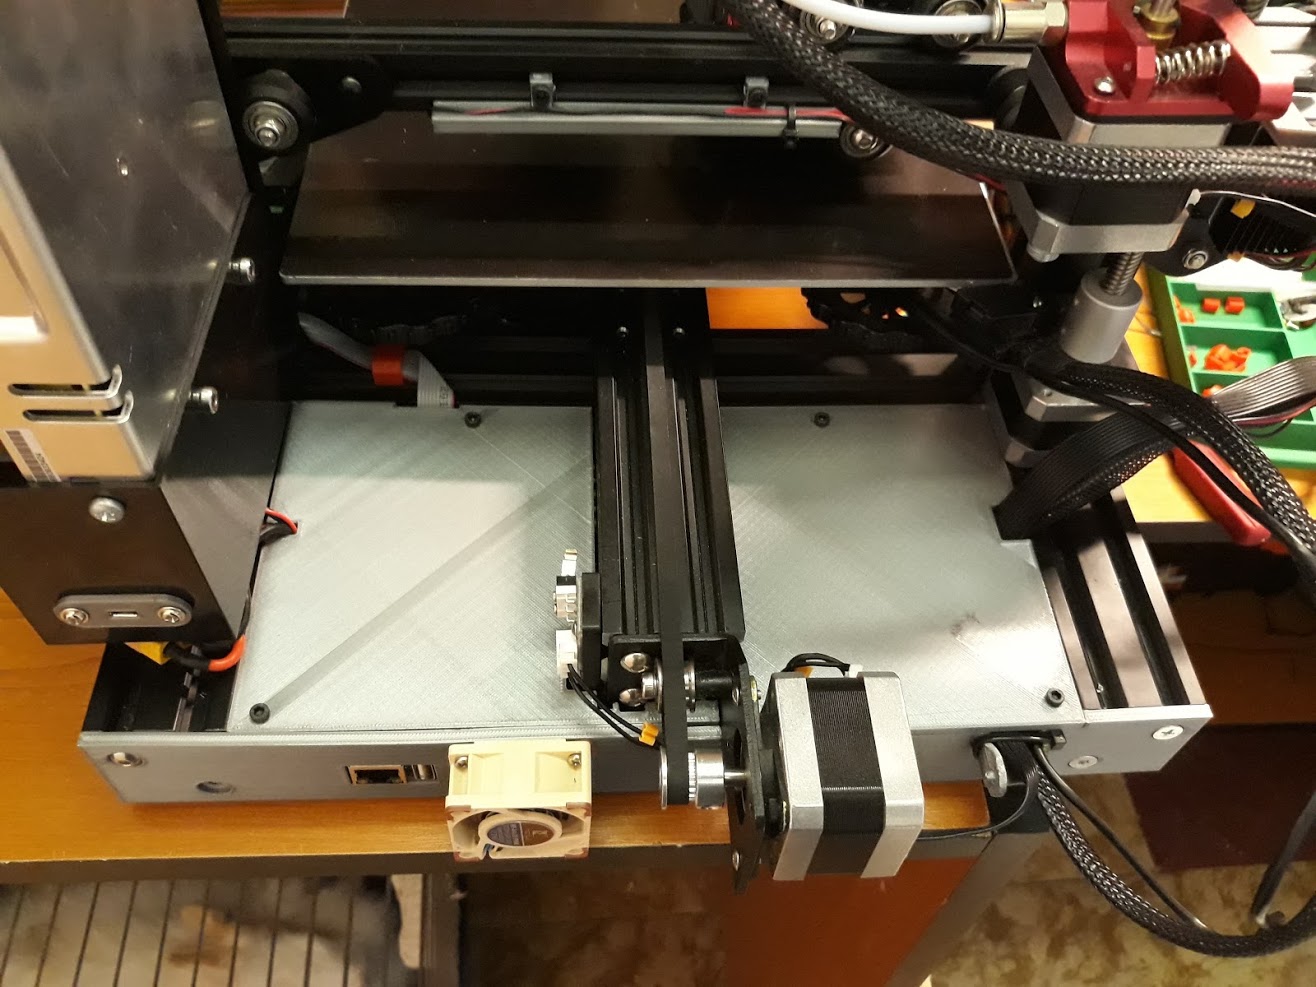
14. Dual Z
There are some people who will convince you that Dual Z is not needed on an Ender 3 Direct Drive printer. They are right :) After installing direct drive everything worked as it should. But if you want to play.... and you will have a more stable printer and more fun.
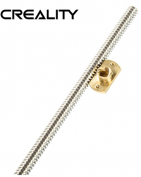 |
I purchased an original Creality threaded rod, but you can use the dual Z installation to replace both rod lead screw with another, with a finer pitch. After all, 8mm per one rotation is imho too much. |
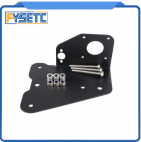 |
The second axis requires a bracket. This one also has a mount for the second engine, for experiments with multicolor in future. FYSETC again confirmed that it does its job well. You will also need the motor mount. Not that something could go wrong on this, but you know ... |
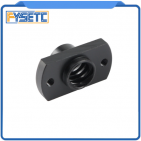 |
I also replaced the brass nut that moves the X axis. This one is made of hardened plastic with very good mechanical properties. The difference from brass is that it can be fully tightened with screws, but it runs smoothly and more accurately on the rod. |
Printed parts - assembly
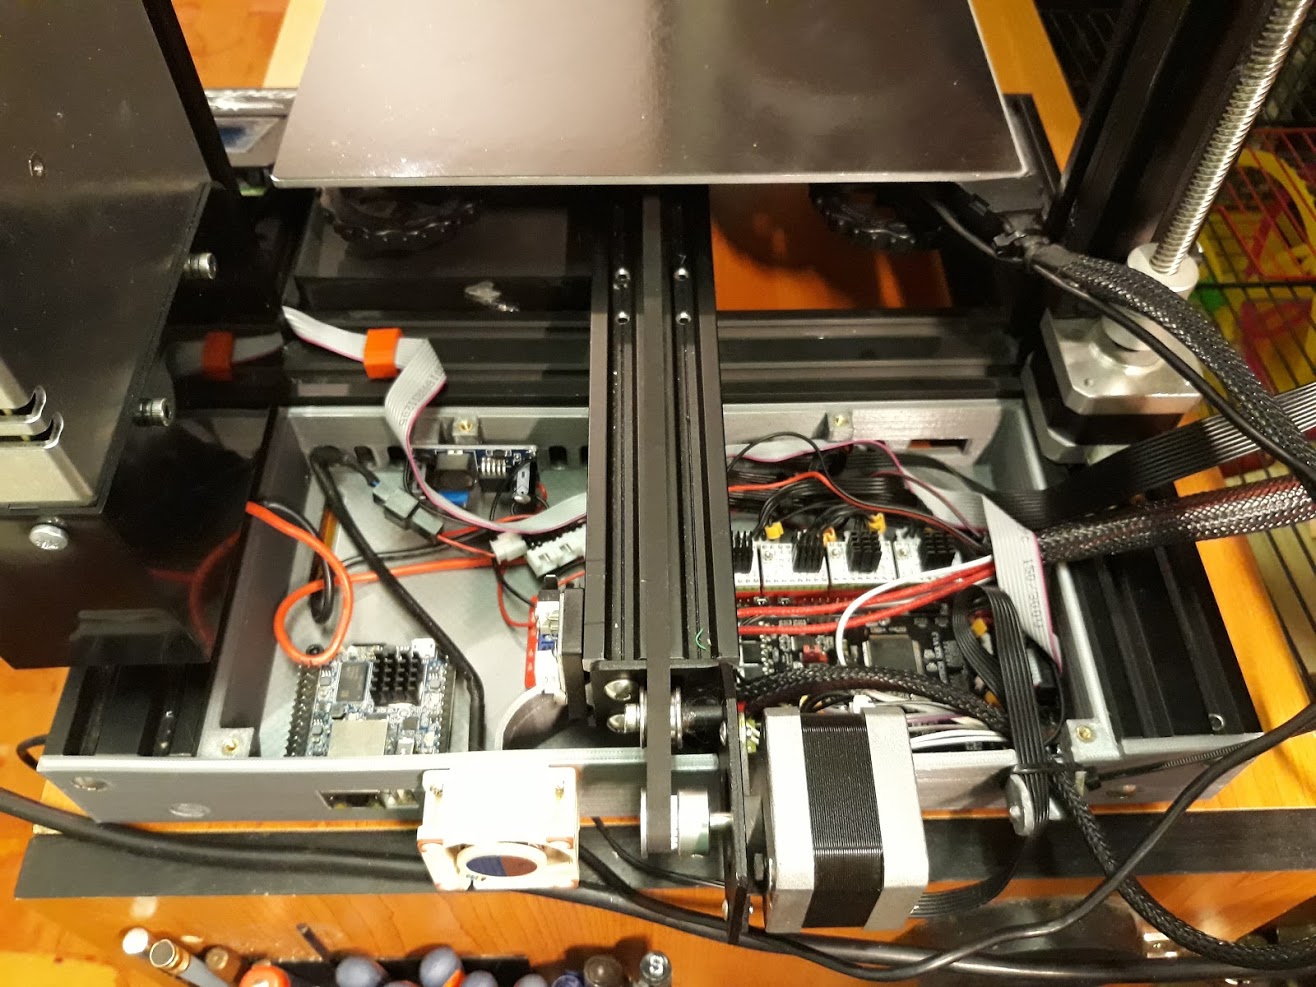
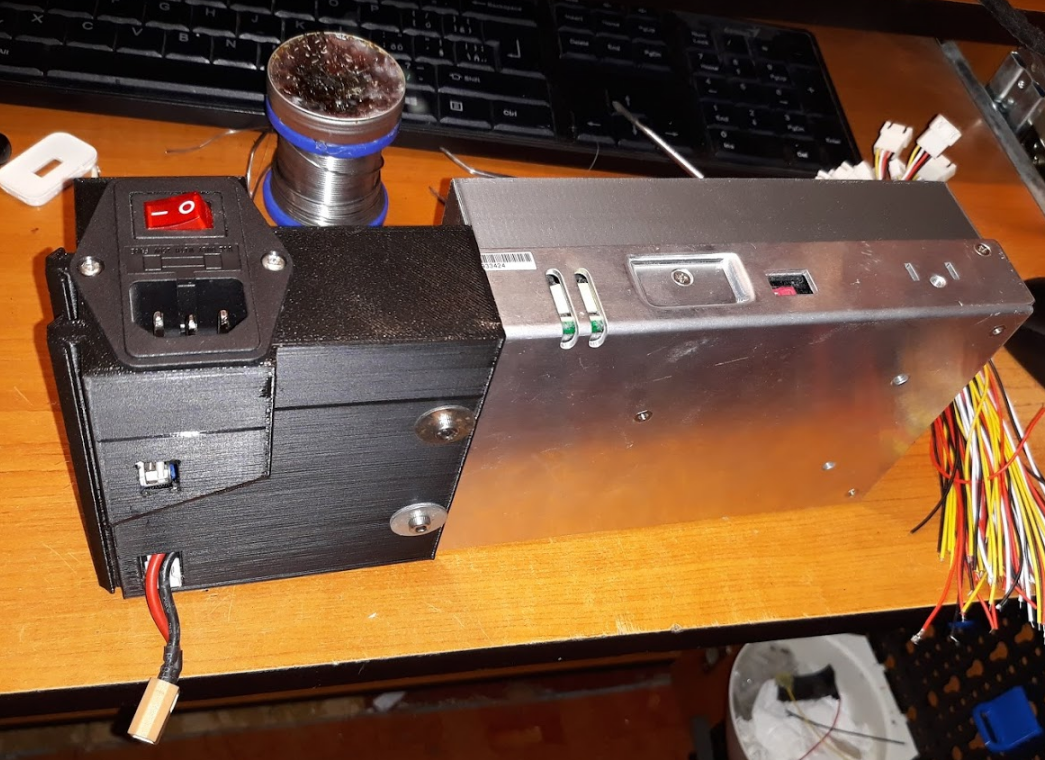
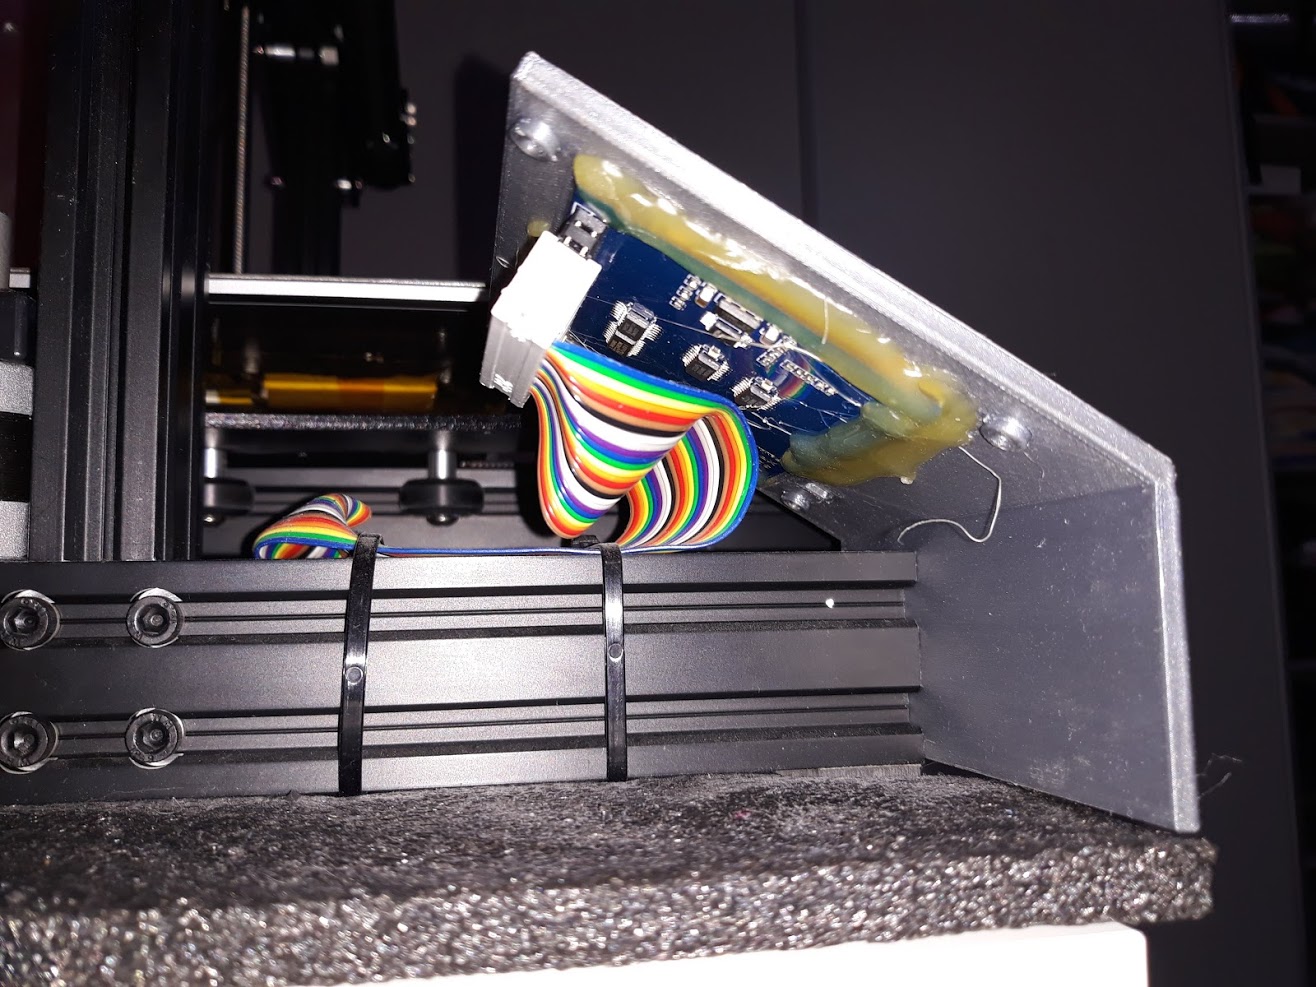
1. Storage of electronics - the case
To store the electronics I remixed a bit of a project, which is also enclosed file for the Fusion360 with the Endet 3 kit. There is again used one Noctua cooler, the temperature on drivers and OrangePi is ok - if you turn off WiFi, it drops by about 5-8 degrees. As I wrote before, the OrangePi runs continuously, but the cooling does not turn on until the printer is turned on. The temperature inside the chip of this Chinese crumb can climb to 50 degrees. It generally does not have as good heat dissipation as Raspberry Pi, but so far it goes without problems, so I have no bad words against it.
 |
 |
 |
 |
| The file with _Bootscreen.h for Depeche Mode fans here. |
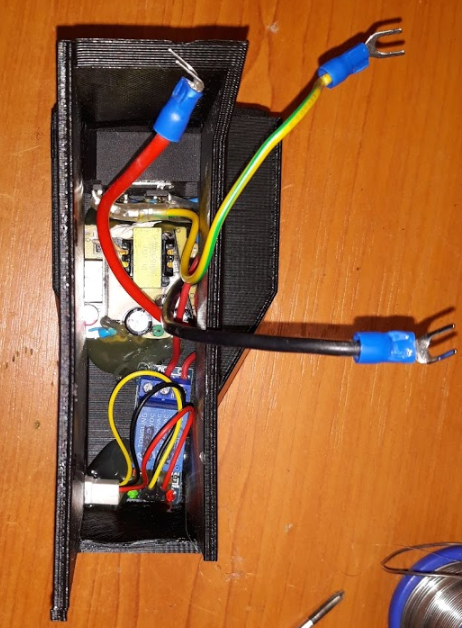
2. Power supply mount
The PSU adjustment consists of two parts. Mounting of 80mm fan and mounting of the PSU itself as such with the installation of the relay switching and permanent power supply for Orange Pi or Raspberry PI. The mounting of the fan is perfect and nothing needs to be changed. Fixing the PSU seems to me a little undone and I'm going to its remix. EDIT: now done. I had to shift the PSU to hold the second Z axis, if you don't use it, you don't need to worry about it.
 |
 |
 |
 |
3. Direct drive
There are a few direct drives on Thingiverse, I used this classic, again a little inspired by Prusa. I just added the holder for P.I.N.D.A. probe. Noctua 40x40x20mm for heatbreak cooling and Sunon Maglev 5015 for print cooling. The real "advantage" of this solution is that you hardly see the print. Another bonus received from original Prusa MK3 :) In addition, when printing on PEI and using any ABL, the first layers will no longer bother you.
 |
 |
 |
 |
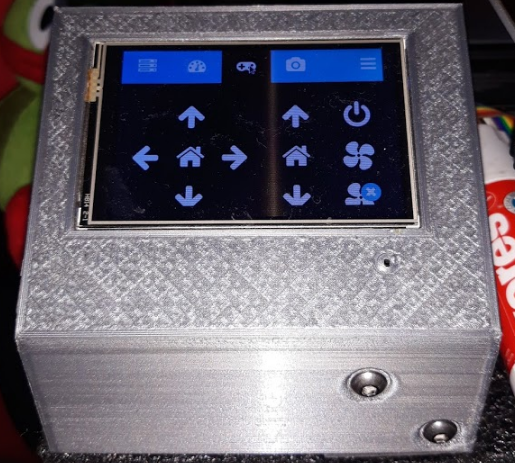
4.Octoprint a TouchUI
Octoprint is a very useful thing. It is a print server for controlling the printer. If you want to control it near the printer, just connect some LCD display for mini computers from the Raspberry PI family. I connected it with a 26-wire cable, so I have a plug for raspberry (or orange, banana, etc.) for other buttons directly under the LCD (not implemented yet). TouchUI is perfect for controlling the Octoprint on such a small LCD (400x320). It is a customized web interface designed for small LCDs. It runs normally in Chrome, which is running on the same hardware as the Octoprint through the X server. In my case Orange Pi Zero Plus.
 |
 |
 |
5. Dual Z
 |
Dual-z is again a simple thing. If you use two motors, which will be synchronized separately using the probe on the hot end, you should define two points in Marlin to test the probe and then automatically level the eventual displacement of one motor over the other. The Z-axis grips the engine perpendicularly to the frame more precisely and adds even better cooling of the engine to the frame. Not that the engines on Z-axis just burned :) |
UUseful Marlin settings
1. Buffer size for perfect work with Octoprint.
The bigger the buffer the better, but the bigger I couldn't get into the SKR 1.3 board - 32 with and 64 without SD card.
#if ENABLED(SDSUPPORT)
 #define BLOCK_BUFFER_SIZE 32    // SD,LCD,Buttons take more memory, block buffer needs to be smaller
#else
  #define BLOCK_BUFFER_SIZE 64 // maximize block buffer
#endif
2. Probe positions for dual Z auto aligment
The position corresponds to the two rear screws on which they hold the bed. I found it nice to tune in with something that has the same position within Chinese capabilities.
#define Z_STEPPER_AUTO_ALIGN
#if ENABLED(Z_STEPPER_AUTO_ALIGN)

 #define Z_STEPPER_ALIGN_XY { {  33, 203 }, { 203, 203 } }
3. Convenient filament change
Setting the speed and especially the length for ejecting and loading filament from the printer menu. You won't have to touch the Extruder anymore. Useful especially for Bowden, where the values FILAMENT_CHANGE_UNLOAD_LENGHT and FILAMENT_CHANGE_FAST_LOAD_LENGTH are over 300mm.
  #define FILAMENT_CHANGE_UNLOAD_FEEDRATE    125  // (mm/s) Unload filament feedrate. This can be pretty fast.
  #define FILAMENT_CHANGE_UNLOAD_ACCEL        25  // (mm/s^2) Lower acceleration may allow a faster feedrate.
  #define FILAMENT_CHANGE_UNLOAD_LENGTH      105  // (mm) The length of filament for a complete unload.
                                                  //   For Bowden, the full length of the tube and nozzle.
                                                  //   For direct drive, the full length of the nozzle.
                                                  //   Set to 0 for manual unloading.
  #define FILAMENT_CHANGE_SLOW_LOAD_FEEDRATE   6  // (mm/s) Slow move when starting load.
  #define FILAMENT_CHANGE_SLOW_LOAD_LENGTH     0  // (mm) Slow length, to allow time to insert material.
                                                  // 0 to disable start loading and skip to fast load only
  #define FILAMENT_CHANGE_FAST_LOAD_FEEDRATE 125  // (mm/s) Load filament feedrate. This can be pretty fast.
  #define FILAMENT_CHANGE_FAST_LOAD_ACCEL     25  // (mm/s^2) Lower acceleration may allow a faster feedrate.
  #define FILAMENT_CHANGE_FAST_LOAD_LENGTH   100  // (mm) Load length of filament, from extruder gear to nozzle.
4. Offset settings for P.I.N.D.A. probe for my V6 mount
#define X_PROBE_OFFSET_FROM_EXTRUDER 33  // X offset: -left  +right  [of the nozzle]
#define Y_PROBE_OFFSET_FROM_EXTRUDER 05  // Y offset: -front +behind [the nozzle]
#define Z_PROBE_OFFSET_FROM_EXTRUDER 0   // Z offset: -below +above  [the nozzle]
Useless things, dead ends etc.
 |
Dumpers – definitely useless Not so much because of the waste of money as the lost time. It was necessary to cut the originally pressed gears on the engines because they held like a Jewish faith. It costs around the dollar for a couple or something, so if you want to see the zero effect, please, feel free :) |
 |
Belt tensioner – osa X Its contribution is very speculative. As I find out, belt tension is a fairly tolerant thing, and after sufficient tension with a lever and screwdriver there is basically nothing to deal with. But once I have it, I won't take it off. For the above reasons, I have not purchased the Y-axis tensioner yet. |
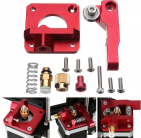 |
Basic aluminium extruder The first upgrade came from the need to replace the original plastic extruder, which tends to have a life of bottle of vodka at the convention of friends of Russia. It replaces it good, preserving all the functions, more like the original Creality plastic horror, which either breaks, tears, or commits suicide in a new, till undiscovered way. |
 |
DualGear Extruder This model is Dual Gear, that means that the filament is pushed by toothing from both sides. Works great, less slippery, but honestly, if the extruder skips, it's usually not the extruder problem (excepts Cereality), but the excessive resistance in the hot-end that needs to be solved (eg. clogged nozzle), not by pushing filament under pressure like nuclear fusion. In the end, this also turned out to be a dead end moving to direct drive, with a much better 3:1 geared BMG extruder and you can use a lighter, so called pan cake motor. Therefore, I recommend buying a BMG clone for a similar money right away, and skip these two extruders completely. |
 |
This was followed by the purchase of a powder coated PEI from Trianglelab. This one has a beautiful grained texture from both sides. Energetic makes better PEI powder. It also offers a pad where one side is smooth and the other powder. Pleas take a look at How to choose flexible steel printing sheet with smooth and powder coated PEI. |
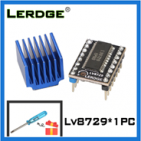 |
Driver LV8729 I bought this driver because of the noise of the TMC2208 driver when Linear advance is switched on. I thought that in case of 128 native steps, it might be less than the extra-256 steps that somehow fail to count correctly with frequent movement changes. Well, it didn't. With the transition to the pan cake motor and the geared extruder, it has become useless, and I enjoy the silent driver TMC 2208 in StealtChop mode. However, this is a good driver, but I just don't have any utilize for it. |